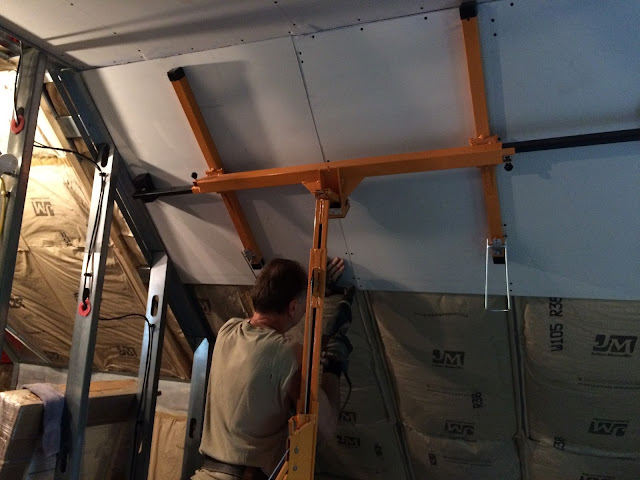
We were excited to get back to drywall today...check out the first pieces on the slanted ceiling!
Fastening...
However, the next piece posed lots of challenges. Unfortunately, our drywall lift doesn't adjust low enough to use in this situation. Jim put up a piece of steel as a block to help position and hold the drywall.
Then he used to lift to get the drywall over to the area but it was very difficult to get it adjusted correctly. I'm surprised Jim wasn't done for the day by the time it was finally up!
But of course, he perseveres. The piece is up and Jim is starting to fasten.
For the next piece, Jim came up with a different blocking system...
Of course, the piece was smaller but it worked much better.
Because the final row on this wall is small, Jim wanted to be able to strengthen it - so he made some scabs out of wood that he attached to the bottom of the row on top as well as to the smaller row. Then the two basically act as one piece and will be nice and sturdy.
Attaching...
All done with lots of screws to hold that piece in place! There's just a little spot left but we'll wait until we have scraps for that.
Cutting the first piece for the wall..
Putting it into place...
Jim let me take a turn trying to put a screw in...my first one went in great. Then I got cocky and my second one was terrible! I turned the gun back over to Jim!
Standing the next wall piece up...
...and putting it into place.
Cutting out the receptacle...
Then cutting out the window!
Yay - looks great!
Jim even vacuums...gotta love it!
We next decided to work on the interior wall - so we got to use our first 1/2" thick piece of drywall but these pieces are 12' long! Because of the tapered ends, Jim first cut a piece in half. That way he can use one cut end for the top against the ceiling, then a full piece in the middle, butting tapered ends, then the other half with the flat end on the floor and the tapered ends in the middle. Smart!
Jim put blocking up and then we each carried an end up our little step stools and set it on top of the blocking.
We got the full piece for the middle cut to size (Jim has to cut just a tad off one end for the length of the wall) and all marked. We saw that there was a bit of damage from the fork lifts on this piece but after we got it over to the bedroom and ready to put up, Jim felt it was a bit more crushed than he was comfortable using. We'll save that piece for another area.
End-of-the-day picture - so exciting to see the room take shape!
 |
| High 76/Low 63 |


No comments:
Post a Comment