We got a little later start this morning than normal because we walked to church in town this morning. But it was a great day!
Jim started by pressurizing the Pex system to make sure it holds air - it does, so all is well there.
Because he had to use the platforms that were on this scaffolding section at the side of the building, he put some planks and a piece of plywood to use it as a half-way point to get things up and down from the deck a bit easier.
Then he brought up some smaller scaffolding pieces to make a smaller tower that we will use up here.
But because we are using our doorway opening to drag things up and down, Jim screwed down a piece of plywood as our first floor mat - just to protect the Adventech a bit from all the sliding of tools and equipment.
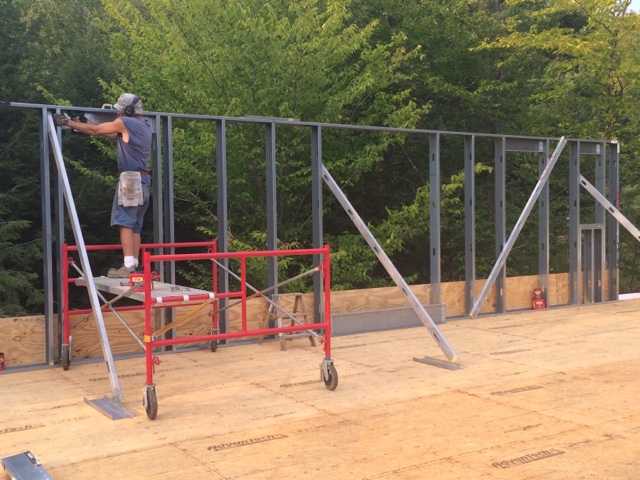
Then it was time to start to build our first apartment wall! Of course, each time you have to reacquaint yourself with the tools and procedures but you can also incorporate some lessons learned for easier ways to do things.
Here Jim is marking the stud lines on the top and bottom tracks.
Starting to assemble the wall...
Screwing everything in place....
Because Jim ordered heavier gauge steel for the tracks this time, it was easier to handle without twisting as much. So once Jim got the studs screwed into the track on one side, we flipped it over. It might not have been pretty, but we got it done!
Then Jim was able to fasten the studs down on this side - this will make things much easier and more stable to have the wall all assembled.
Here Jim is punching holes so that he can fasten the track to the deck through the top of the nailer board so that everything is very secure.
Then we had to flip the wall back over again - this time it went a little smoother!
Just like the blocking that Jim uses when we are putting up sheathing to "catch" the sheathing and hold it in place, he used a cut off piece of track for sizing and screwed down a block of wood next to it.
Then he repeated it on the other side of the wall.
A bead of caulk along the edge was next just to help keep water out of the floor below a bit.
Then we were able to lift the wall into place - Jim's blocking worked perfectly! He got a brace clamped to the wall...
...and then attached to the deck.
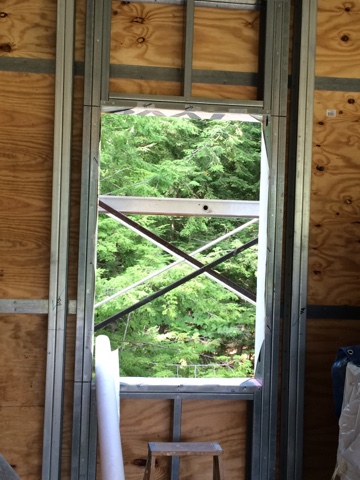
Wow - our first wall is standing by itself! You can see where windows will go - the big space is for two double hung windows in the living room - at the right side will be a bathroom window. Exciting to see the plans come to life! However, all these windows mean a lot of work for Jim to build the framing structure again - but at least he's done it before.
Better make sure the wall stays standing - time to screw it down through the track.
Then we had to get the wall straight in both directions - so first along the inside of the stud and screwing the bracing down once it was perfect.
Jim also put another piece of bracing to keep the wall straight.
Then he straightened the wall in the other direction by temporarily attaching a stud to the outside for a totally straight edge and making sure it was level.
Time to get the track ready for the next wall section. We will have to bring the saw up on the deck (which will be quite a challenge because it's extremely heavy!) but since the day was drawing to an end and we just had two pieces of track to cut, Jim lowered the pieces to the ground...
...and cut them to size and handed them back up to me on the deck.
Time to mark up this section...
Jim decided it would be easier to punch the holes before the wall was put together, so he got that done. Not sure what this big purple square is surrounding Jim's head...ha! Must have been the angle of the sun going down...or ghosts!
It's really crazy to see how high the building is now - three stories from the ground in the back! Our apartment wall looks amazing and we can't wait to build more tomorrow!
 |
| High 80/Low 59 |