Wednesday, October 28, 2015

10.28.2015

It was inevitable...the rain coming from the hurricane Patricia showed up in the North Country this morning.  It's really hard - yesterday was such a positive day, getting lots of rafters up, feeling good about our progress.  Then today, the rains come and it's depressing!  Not only can't we work but we know that everything in the carriage house is now soaked.

It worked out well that I had an appointment to take my car in for a recall fix - the dealer is near Schenectady so I would have been upset if it was a beautiful day.  As it was, that block got checked.

Jim still made good use of the day.  He did a little reorganizing in the shop downstairs and then switched to working on the driveway.  He wants to get a truckload of gravel on the driveway before winter and wanted to do some repair work and a little regarding before that.  So while it was a muddy, messy job, again he didn't have to use a sunny day to get it done.

 
After he got that as good as he could considering the weather, he went and ran a couple of Lowe's/Home Depot errands.
 
High 51/Low 49 - rainy
 

Tuesday, October 27, 2015

10.27.2015

Jim  got to the land a little later than he wanted to this morning...he got the quote back from the roofing people and it was quite a bit more than we were expecting.  Of course, now they include all the special pieces, like hip and valley pieces, that cost more.  The roofing place is still insisting that we use copper flashing because of some galvanic issue with the rubber.  I had already asked the company rep about that and he said it wasn't true.  So Jim put the question to the company on their website and someone called back.  It ended up being a good conversation and Jim learned quite a bit about the product - and this guy insists that you don't have to use copper, although the roofing material lasts so long that you have to make sure everything else you use does too.  So more pondering on roof issues is in store for us when we thought we were pretty much done with that decision.  While the conversation with the roof rep was good, it took up some valuable working time.

But Jim got busy and spent another morning making rafters...


After lunch, we got up on the deck and started installing.  First up was the clip angle...


Putting the next rafter in place...


Fastening it down...


Measuring for the next clip angles...


Another rafter in place...


Bringing up the next piece...


Getting the location marked on top...


Then we got it in place and Jim is fastening it down...


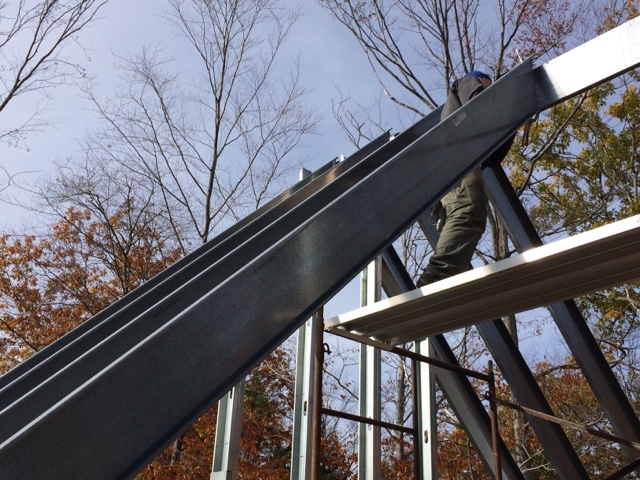
The last main rafter on the back side was a tough one.  This piece has a 2" flange which makes it much heavier to handle.  Then you can see how tight the fit is - while poor Jim is holding up the top, I have to fit it in between the clip angle, the stud and underneath the sheathing.  Whew.


Four rafters up and in place!  While the pictures make it look fairly easy, there is so much prep work to each of these rafters.  A lot of it is work that Jim has to do moving the scaffolding around for each piece.  The platforms have to be in a certain position so that he can prop the top end of the rafter in between the platform and the frame while I hold the bottom and he scrambles up the scaffolding.  Then he has to move the platform again so that he can reach the top to put the rafter into place.  And he is up and down the scaffolding tower countless times for each rafter - making sure everything is in place both top and bottom and then fastening it down both places.  Usually the scaffolding has to be moved to a different position and then it starts all over again.  Jim's muscles get really fatigued between carrying and holding the rafters, moving all the scaffolding, and then using full force to get all the screws in.  Especially now when the driver is working at about 50% efficiency.


But we pressed on.  The next rafter is a dormer rafter which gets attached to the end of the wall, so Jim had to put up a temporary brace to hold it.  This rafter also gets attached to the big main rafter we just installed, so its fit is a little different.


We got it in position and Jim is fastening the two rafters together.


Then we put up another main rafter on the front side...


Another dormer rafter was next...


And the final rafter of the day - number 7! - was another dormer rafter.


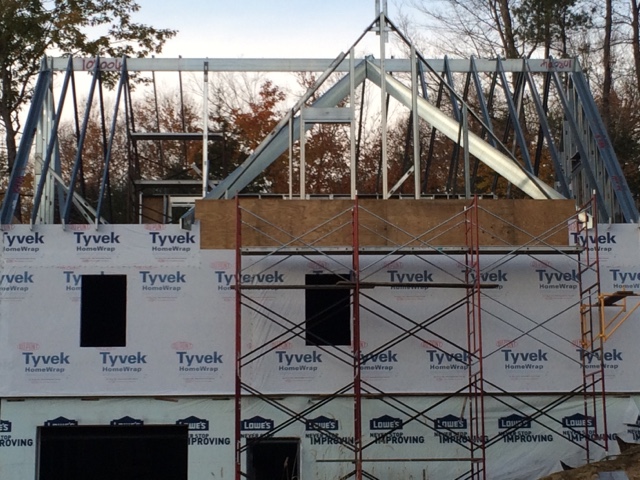
Getting to be lots of steel structure on top now!

 
High 47/Low 28
 

Monday, October 26, 2015

10.26.2015

It was a day of a few distractions, but at the end we were happy with the progress that we made.

Jim started off by heading over to the little auto repair place in town to see if he could get the older 4Runner inspected.  It passed!  Thankfully they don't check too much so we were thrilled.  We just need it to survive one more winter!

Then the rafter factory went back into business...


Before we did anything else, Jim finished attaching all of the screws in the ridge beam that we finished yesterday.


Then he had to make and attach the clip angles so that we could put up the end rafters on top of the wall.


Putting up the temporary brace so that the rafter doesn't slide off while we're trying to put it up!


Then the distractions came...Jim got a call from Lowe's about our moldy plywood.  They had previously given us some cleaner that we have to spray on (when we have time!) but they were negotiating some cash back also with the manufacturer.  So the rep called to say that they were done with that - we aren't sure exactly how much it will be but at this point anything is good!

We got busy again and Jim's phone rang again - this time it was the delivery driver for our new scaffolding.  Jim has been working on trying to get scaffolding for months and months.  He wanted a certain type that would be compatible with what he already has and a certain kind of angle cross braces - should be easy but it wasn't.  They were either out of one or the other and then shipping was an issue.  Finally the stars aligned and he was able to order what he wanted.  So we had to stop and take the Bobcat down to await the delivery.

This guy was right on time and the delivery went smoothly thanks to the Bobcat's forks.


Making the trip up the hill with our new scaffolding!
 

Finally, back to work!  Jim is hauling up the end rafter...


Getting it stable so that he can move up to the scaffolding and get it in place.


Again - no installation pictures since I'm working the tail end of the rafter to get it in the clip angle.  But it's all in place and fits great!


Fastening down the bottom...


Once the first one was in place, time to move the brace on the other side to get ready for the next piece.


All in place and Jim is fastening it down!


Making all the top connections - everything fit perfectly!


Putting on the next clip angle...


...and another rafter in place!


Then we got it's mate on the other side in place.


Looking great!  Jim is very happy that some steel is going over the big empty spots - he reminds me many times every day to be careful!

 
Unfortunately, we had another driver mishap.  If you could see Jim having to do the limbo around all the scaffolding platforms when he's putting these rafters up, you would definitely understand how these things happen!  He's crouching in between platforms with his driver on his belt - if he moves to stand up, sometimes that action can force the driver off the clip.  Which happened today and the driver fell.  It wasn't that far and it was on a wood surface so it shouldn't have hurt it, but it's not working great now.  Which is why we have two drivers - except that the other one is being repaired because it stopped working again after it was repaired earlier this year.  Groan - just figures.  Hopefully he can make this one last until we can get the other one back or a new one ordered.  The driver is the most important tool with all this steel - we can't afford not to have it!
 
High 50/Low 25
 

Sunday, October 25, 2015

10.25.2015 - Ridge Beam Finished!

We had some rain overnight and the morning was quite foggy when we went to church.  Jim said Lake Angel was back when he got to the site.  But he hooked the sump pump up and look at the water gushing out!  He has to sometimes play around with it to get it to continue working but it's certainly worth it.  It's much easier for me than bailing water and it's just kind of depressing to be sloshing around in puddles inside.
 
 
The poor lawn mower has been sitting outside where it died.  New fuses didn't work so Jim has to spend some time working on it - yeah, right!  But the problem was that he didn't want it sitting out any longer and it wouldn't turn on.  So this morning, he got the Bobcat out and alternately pulled and pushed it, even having to stop and put air in a flat tire, until he got it inside the shop.
 

Then Jim got busy making the tracks and the first studs for the other wall section.


Putting the pieces on the deck...


Punching the holes in the track - much better than drilling!


Fastening the first double stud together...


Putting the stud into place...


Fastening the corner together...


Putting the next double stud in place...


Then we flipped the wall over - again, difficult with so much steel surrounding us now! - and Jim fastened the other side.


And it's standing!  On this side we were able to just stand it up and then move it down into position (sounds a little easier than it was with a 15' wall!).


The wall looks great standing up so tall!


We then had to take apart the scaffolding and move it over so that Jim could take the bracing pieces down from the first gable wall to use on this new wall.  For those who are very observant, I said in an earlier post that Jim took these down and used them for the front wall.  That was the plan, but after I left Jim decided to do the front wall differently.


Then it was a crazy puzzle to move the scaffolding again.  We tried quite a few different directions in and out of all the bracing and Jim finally got it over on the other side of the deck.


Once Jim had the scaffolding up, we stood on top of it looking out over the trees!  It's crazy high up there! Now that leaves are falling, you can start to see the mountains through the trees again.


Then Jim worked on the connection of the two wall sections - it went together perfectly - he just had to bend the tabs down and everything fit just as it was drawn up on paper.


Fastening the top connection...


Putting the brace pieces in place...


Then the next nerve-wracking task - putting up the remainder of the ridge beam.  It's not only a huge piece of steel to get up in the air but it has to mate perfectly with the existing beam and sit level on top of the wall we just built.  Just a few minor points to consider!

So Jim cut the first piece to size and brought it up...


Dragging it through the braces on the wall....


...and then lifting it into place!


Then Jim had to slide the channel piece down to mate with the existing beam.


Whew!  All in place!  Then Jim brought the level up and it was perfectly level - truly amazing!  Such attention to detail along the way really pays off!


Fastening it into place...


Then Jim had to bring up the track piece that fits on the other side to make this a beam.


Sliding it into place through the bracing...


...and then fitting it over the channel piece all the way down.


Fastening it all together!


Wow - the ridge beam is finished all the way across the top of the building!  What a big check mark today - and it all went pretty smoothly.


High 55/Low 30