Thursday, April 13, 2017

4.13.2017 - Start of plumbing

Water and plumbing played a key role today - we've been under a boil advisory for the last few days since they broke a main water pipe near the apartment - it finally got lifted around noon today.  We've also had a leak under the kitchen sink for a few days - the landlord finally said he would be here today to fix it.  He came but there's still a small leak.  Jim is going to bring home a tool tomorrow and see if he can stop it.

The first things that Jim did this morning was work on a little blocking in the kitchen...


He also cut pieces for blocking for the banquette - we just have to figure out the height we want the table before he fastens them down.


Then it was starting to figure out plumbing.  Jim marked off the sink cabinet in the kitchen underneath the window to figure out where the plumbing and vent will go. 


But then the first plumbing work was to begin figuring out the main stack.  This is what it liked like before he started coming through the floor in the utility room...the green pipe acted as a collar in the opening when we poured concrete - the stack was capped and taped to keep concrete out.


Jim took the tape and cap off and had to cut the collar flush with the floor.  He then attached a riser clamp to hold the stack in place and carry some of the force of the stack down to the floor.


Jim basically has to try and build the stack in pieces, figuring out each leg as he goes, to make sure everything works. 


First step was to build it up and get it angled correctly through the truss and over to the opening, figuring out the right slant in the pipes.


Cutting pipe...


Working on the vent to figure out location where he will have to drill through the floor...


Jim will continue to build on to the stack and figuring out how to make things work - he's not gluing anything at this point.  But it's a good start and fun to see it in progress!

Then it was back to doing some insulation work...


Filling in the last cavity in this wall in the master bedroom closet...
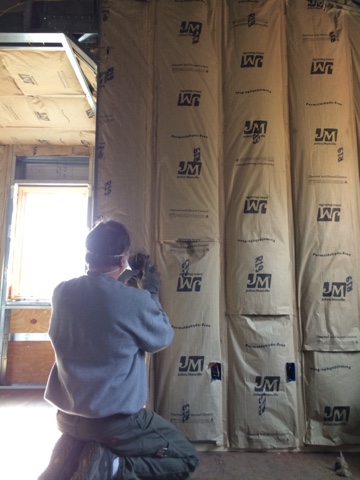

Stuffing some excess insulation in the voids first...


Then putting in the batt...


Wow - besides a few details, this wall is about done!


We went to Holy Thursday Mass tonight in Saratoga and then decided to stop at a new burger place in town and toast to passing our electric inspection!

 
High 56/Low 31
 

Wednesday, April 12, 2017

4.12.2017

It was a great feeling for Jim to be able to go out to the property today and not have to think about electric work!  Time to move on to other projects!

He started his morning by doing more blocking in the kitchen for cabinets...


Then he put up the first piece of reinforcement plywood underneath the entry way in the apartment.  Jim needed more glue - I had my physical this morning and then ran a few errands, including picking up glue and dropping it off to him.


I got to see the grading work he did at the end of the day yesterday - this area looks really good!


In the afternoon, Jim went into Saratoga for the first of many trips into the plumbing supply company.  He got some pipe and fittings to get started - exciting to be starting this phase of the project!


He also worked on more insulation in the master bedroom.  The corner of this wall was the toughest - he had to stuff the voids with insulation before he could put up the batt.  Plus he did the top of the wall and filled in some of the bottom pieces.


Jim brought a box of these caps down from the shed a few days ago.  They had a nail in them - a couple of days ago, I took the nails out of a good supply of them.  Jim then put a screw through the hole that was already there and is going to use them to attach the rigid foam board.


To get ready to put the foam board on, Jim first had to mark the lines to annotate where the studs are.  That way, when he puts the foam board up, he knows where he needs to fasten.


The final look - Jim uses a special glue plus uses the caps and screws the board to make a really tight fit.


High 56/Low 35
 

Tuesday, April 11, 2017

4.11.2017 - Rough electric inspection!

Jim called the electric inspector this morning before he headed out to the property.  The guy said he could come after lunch.  I had work to do this morning but as I headed up the driveway, the inspector was just getting out of his car.  I'm glad I was there because I got to hear lots of words like...meticulous, I love it, nice, you know what you're doing, I trust you!  Great words from an inspector!  Everything passed with flying colors - the only thing Jim has to do is exchange some of the breakers for arc fault breakers.  When the inspector was out earlier, he told Jim that the code had changed but he didn't have to worry about those breakers for this building; he could do it in the house.  But he obviously forgot he said that and since everything else was good, Jim can switch out the few breakers - they're just more pricey of course.  The other good result was that the inspector said that all he cares about in the metal shop is that there is one light and one receptacle - which we have more than that so it's good.  So now Jim can add additional lights and circuits and won't have to worry about an inspection.  The next electric inspection will be the final one - everything has to be done.


Getting this inspection was such a big block to have checked - because of the complexities of the steel with wiring, in the back of his mind, Jim thought he might have to rework something.  Plus, he was trying to leave insulation open around wires and boxes in case the inspector wanted to see something.  Now he's free to move on from electric!

One of the things that Jim wanted to do is to reinforce a couple areas of the apartment floor by adding 3/4" plywood from underneath.  One of those areas is underneath the toilet - in the event that something would ever have a slow leak, the floor underneath can become rotten.  The other area is when you first walk in the apartment - the AdvenTech in that area only spans one truss and Jim wanted to bolster it from below.  Measuring and cutting the pieces...


Using his brace to hold up the plywood - he first glued it and then went back and put in lots of screws.


Once it was all screwed down, he cut a hole through both layers from above for the toilet plumbing...

 
Trying out the stainless steel flange...
 

From underneath, you can see all the screws!

 
At the end of the day, Jim did a little grading by the side where the boom truck will have to park to get drywall through the back window.  While the ground is still somewhat soft after the winter, it's a good time to do some grading and let the rain help compact it until we're ready for drywall.
 
High 80/Low 54


Monday, April 10, 2017

4.10.2017

Jim spent quite awhile first thing this morning rearranging things in the metal shop.  He'd like to get the chipper out soon and it was behind a mountain of insulation.  He got things much better organized.

I ran to Lowe's to get another GFI receptacle as well as some foam.  He used the foam to fill in the tunnel for the wire going from the outside light into the switch box.  He'll trim this flush later.


Jim worked on all the loose ends in the electric work before he calls for inspection.  He put some higher-grade switches in the wood shop and went over everything once again to make sure it's all in good shape.

He also did some more blocking in the kitchen for the top of the upper cabinets.


But it was a glorious day - we just had to do a little outside work!  This huge tree fell quite awhile ago so we decided to do some clean up.  Jim had some chainsaw issues - his big one is kind of on its last legs with no time to rebuild at the moment. 


The battery for the chipper is still at home but we got all the branches put in a big pile ready to be chipped.  But it looks better already!

 
We did get home to a boil alert...they broke a water main pipe doing some repairs on the street next to ours.  Hope that doesn't last long!
High 75/Low 53 - gorgeous!
 

Sunday, April 9, 2017

4.9.2017

A short day but Jim got lots done as always.  He worked on putting up more rigid foam board.  Using a cool insulation knife that Kyle & Julia got him awhile ago...


He cuts out the area for the ceiling joists...


Then puts it up for a nice snug fit...


So that there are no voids, Jim stuffs waste insulation in this wall area where there are studs on the wall as well as wall studs...


Cutting the wall insulation...


Putting it into place...


Gluing it down to the studs...

 
I went around and put caps on the neutral wires in all the apartment receptacles - just in case the inspector wants to see those. 
 
High 62/Low 40
 

Saturday, April 8, 2017

4.8.2017

Now that the metal shop is in good shape, Jim turned his attention to some of the loose ends that need to be done before he can call the electric inspector.

This is the switch box by the side double doors - the first one turns on the lights in the stairwell.  The other switch will turn on the outside lights by this door.  But, those are going to be recessed lights under an overhang which has yet to be built!  So the wires are all brought into the box and pigtailed except for the power and ground which Jim will connect once the lights are installed.


The wire all ready for the outside lights...


Next, Jim did some framing.  This is the area on the stairwell landing in the metal shop.  He made a little corner wall - right now it's being used to encase wiring, but eventually the intake or outtake for the heating system may come up through this wall also.


Another loose end...Jim had all the wires over to the box for the dryer but needed to wire up the receptacle.  This took him over an hour - as you can see, it's very heavy gauge wire so it's difficult to work with.


At the end of the day, Jim did more insulation work.  He put the rigid foam board in the attic space - this acts as a backing board for the wall insulation too.  You can see that above the top of the wall, he also put foam board in between the ceiling joists.  That way he can put insulation right up to this point.

 
High 44/Low 29