But Jim got busy and spent another morning making rafters...

After lunch, we got up on the deck and started installing. First up was the clip angle...

Putting the next rafter in place...

Fastening it down...

Measuring for the next clip angles...

Another rafter in place...

Bringing up the next piece...

Getting the location marked on top...

Then we got it in place and Jim is fastening it down...
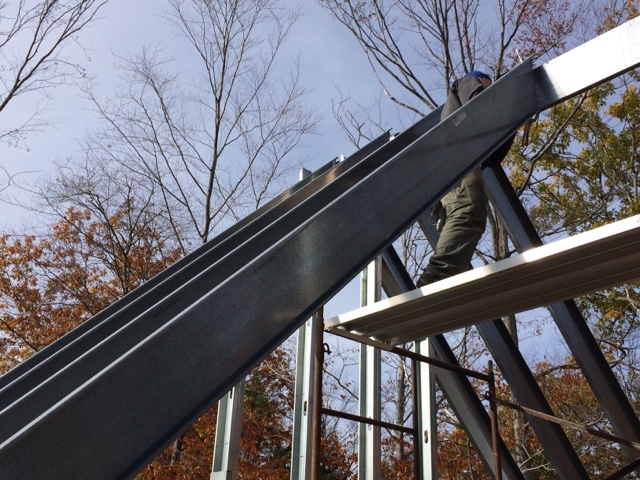
The last main rafter on the back side was a tough one. This piece has a 2" flange which makes it much heavier to handle. Then you can see how tight the fit is - while poor Jim is holding up the top, I have to fit it in between the clip angle, the stud and underneath the sheathing. Whew.

Four rafters up and in place! While the pictures make it look fairly easy, there is so much prep work to each of these rafters. A lot of it is work that Jim has to do moving the scaffolding around for each piece. The platforms have to be in a certain position so that he can prop the top end of the rafter in between the platform and the frame while I hold the bottom and he scrambles up the scaffolding. Then he has to move the platform again so that he can reach the top to put the rafter into place. And he is up and down the scaffolding tower countless times for each rafter - making sure everything is in place both top and bottom and then fastening it down both places. Usually the scaffolding has to be moved to a different position and then it starts all over again. Jim's muscles get really fatigued between carrying and holding the rafters, moving all the scaffolding, and then using full force to get all the screws in. Especially now when the driver is working at about 50% efficiency.

But we pressed on. The next rafter is a dormer rafter which gets attached to the end of the wall, so Jim had to put up a temporary brace to hold it. This rafter also gets attached to the big main rafter we just installed, so its fit is a little different.

We got it in position and Jim is fastening the two rafters together.

Then we put up another main rafter on the front side...

Another dormer rafter was next...

And the final rafter of the day - number 7! - was another dormer rafter.

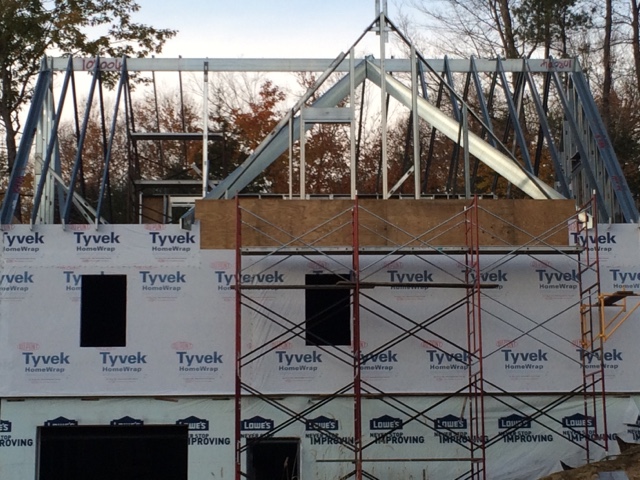
Getting to be lots of steel structure on top now!
 |
| High 47/Low 28 |
No comments:
Post a Comment